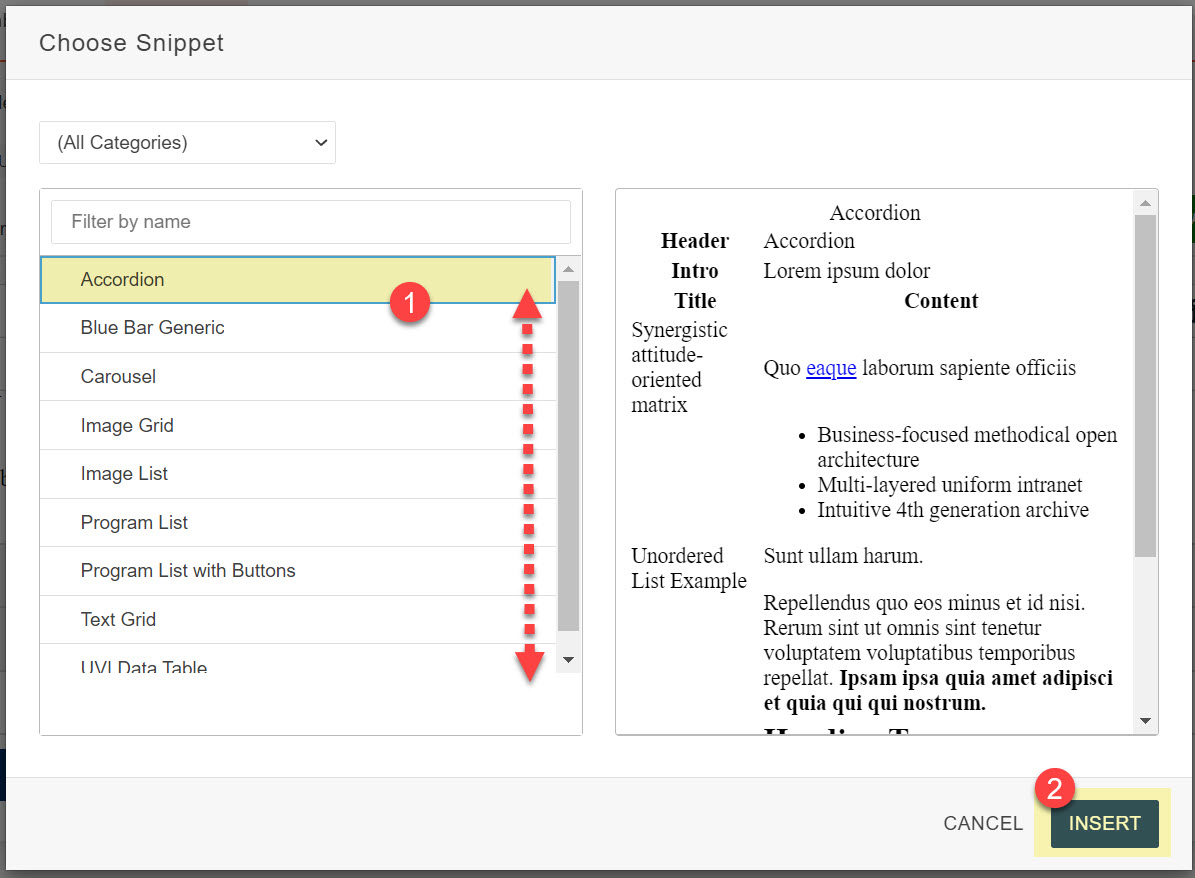
Follow these directions to insert a a snippet in a page in Omni CMS:


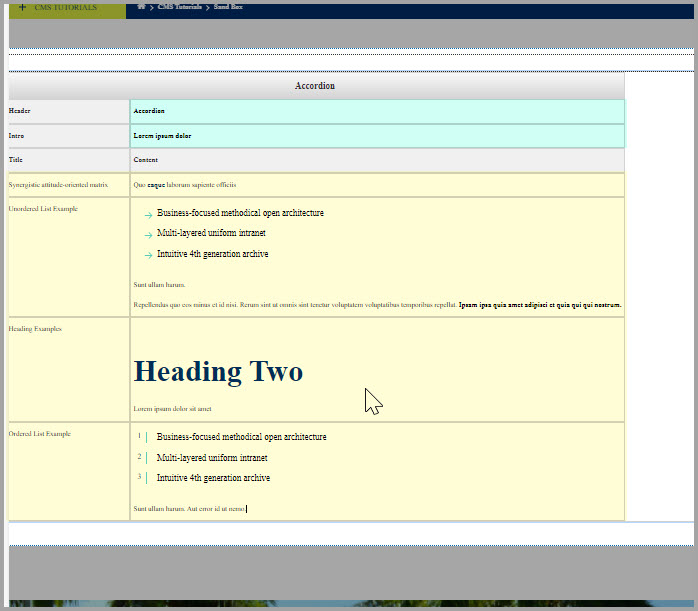
Once the Snippet is inserted on the page, it appears as a table, and you edit certain cells with your content. Typically, each row in the table represents an item in the snippet.
For example, in the Accordion snippet, each row creates a separate accordion item. Other snippets work in a similar fashion where each row creates a new item.
Rows are highlighted in yellow.


To copy a row including its contents, right click in the selected row, select Row > Copy row. Then right click again and choose Row > Paste row before or after
Alternatively, you can add or delete a new row by selecting either option in the table
menu that appears either above or below the table when the cursor is inside the selected
row.
There are a few notes to watch out for when using Editable Tables.
Alternatively, you can select the Delete table option from the table menu that appears when the cursor is placed anwhere inside a table.
Contact us if you are having trouble, or need assistance.